
The First Two Test Contents Of The Trigger Sprayer Sample Test
-
It is an essential step to request a sample test before making a bulk order. Especially for trigger sprayers, there are a wide variety of trigger sprayers with different designs, materials, mechanisms and functions.
These tests include:
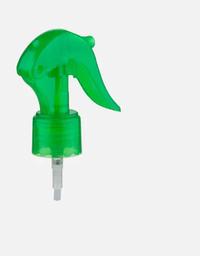
- Visual inspection
When we open a package from a supplier, the first thing we do is check the appearance of the sample. Hold the sample and check for visual defects such as plastic flash, scratches, contamination, short shorts, and poor assembly. If you need color matching swatches, please use color swatches or Pantone swatches. But even if you need standard color swatches. For example white, it is also necessary to check whether the spray pump can be installed on the paired bottle. There are many variations of white, such as pearl white and milky white.
Weight checking is an important but easily overlooked test step. There are countless factories that make trigger sprayers, and their product pictures on their website can look like a thing. But different plastic wall thickness, invisible internal structures will lead to 7 different dispensing performances and life. A weight check is one useful way to measure this. Simply place the trigger sprayer (without dip tube and unused) on the gram scale and calculate the average weight of at least 6 samples.
- Neck compatibility
Make sure that the neck of the trigger sprayer can be paired with the target container, for example, a 28/400 trigger sprayer should be paired with a 28/400 neck bottle. Manufacturers should follow the same standards developed and published by GPI and SPI for the manufacture of threads and closures. However, even trigger sprayers of the same standard size and bottles from different manufacturers may not match beautifully due to variables and standard tolerances in the manufacturing process. For the loss, we need to take another step forward. First, ask the supplier to provide technical drawings. Then measure the size of the sample with a ruler to be at least "T", "E", "H". Compare the data with technical drawings and corresponding bottle sizes to ensure they fit.